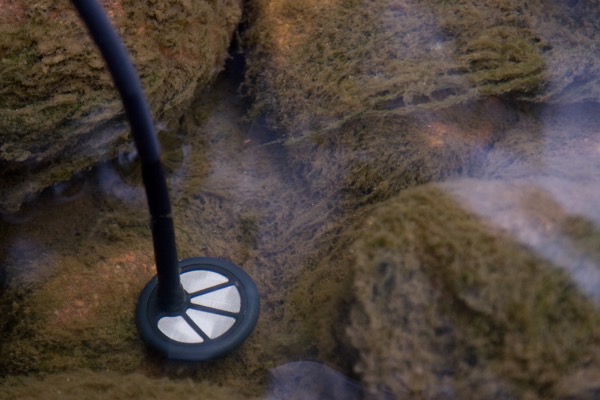
I returned from a nine-month trans-Africa trip in our Defender determined to re-design the water system and to install hot water while I was at it. What we had worked passably for short trips, but for long trips we needed something altogether better. Keeping water in jerry cans and using a portable backpacking filter to clean the water just proved to be too cumbersome on a long-range expedition, even for basic camping. Using a solar shower proved inadequate for water heating as, even under the African sun; vehicle motion cooled the shower off almost as fast as the sun heated it. Had we stayed stationary for long periods the solar shower would have been a better option.
Meeting other overlanders on the way I saw many ways to improve the set up as well as expanding its versatility, and with that in mind my criteria were as follows:
- True hot water capabilities
- Shower with pump
- In-line filtration with a pump
- Enable drawing water from sources outside the vehicle
- Ability to draw either filtered or unfiltered water
- Allow the tank to be filled by the onboard pump
- Provide a gravity-feed back-up tap in case of pump failure
- Position the tanks low and centrally in the Land Rover for best weight distribution
- Fit a robust and field-serviceable filter capable of eliminating all biological nasties
- Compatible fittings on all outlets
- Minimum tank capacity of 20 U.S. gallons (75 liters)
Fulfilling these many criteria required putting a little thought into the design and fitting while undertaking research online to select an appropriate tank, filter, heat exchanger and pump.

I started by looking at the well-respected Brownchurch water purification system with shower attachment.
This system includes a pump, a filter and a showerhead, though did not provide a way to include hot water. While it is intended for including in a vehicle, the Brownchruch system is essentially mobile while my system would have to be more integrated into the vehicle.
Tank
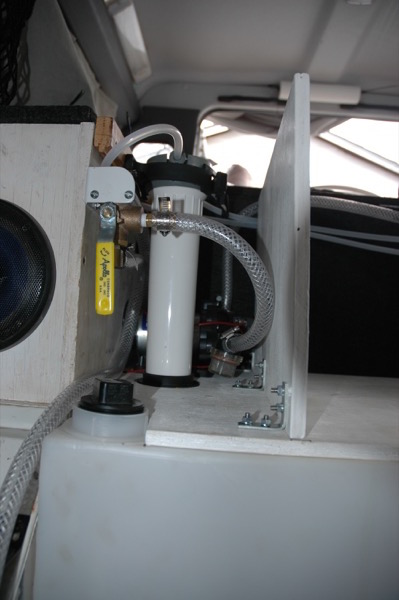
Since it proved its worth in convenience, I decided to keep the 7.5-gallon (28.4-litre) rear quarter panel mounted tank. To add to the capacity, I replaced the two seven-gallon jerry cans used in Africa with a single 15-gallon (57-litre) tank from plastic-mart.com and mounted it behind the rear drawer system just forward of the rear axle; as close to ideal as I could get. The tank is only eight-and-a-half inches tall and so keeps the weight low. Neither tank has an access port for cleaning, so for a thorough cleaning the system has to be shock treated with chemicals (I use chlorine).
Filter
Looking into the many filters available, I narrowed my choice down to Doulton’s IP100SC, an under-sink type filter housing with what Doulton refers to as a ‘supercarb’ candle filter. This filter has three stages: a 0.2-micron ceramic filter to trap particles, bacteria and cysts; a silver-ceramic matrix which acts as a bactericide and viruscide; and finally an inner core of activated carbon which removes chlorine, un-filterable organic compounds and improves taste and odour. The non-renewable or washable carbon core limits cartridge life to 1000 US gallons (3,800 litres) at a flow rate of 0.5 gallons (1.9 litres) a minute. The primary ceramic element is easily washable by scrubbing with a scouring pad to remove debris and improve flow as it gets clogged by small particles.
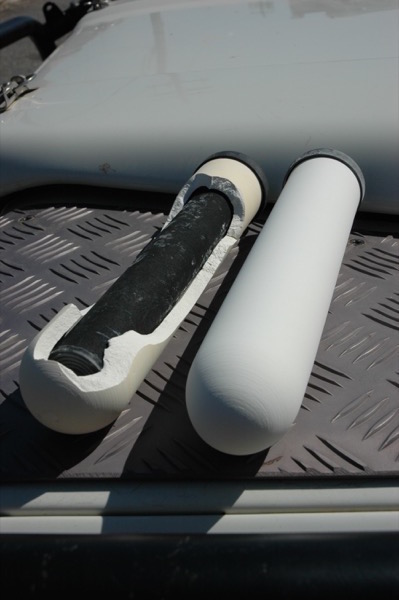
In 2009 I tested and reviewed several overlanding water purification options for Overland Journal magazine (Fall 2009 issue). The test involved inoculating clean water with known levels of bacteria, running the water through the filter systems and then testing the effluent for the known bacteria. The results of this test supported Doulton’s stringent claims; no bacteria got through the filter, nor did anything else. The performance in the lab tests underlines why Brownchurch selected Doulton elements for their water system.
Heat exchanger
After many trips, hot water for a shower had become a high priority for our overland build-out. I despise re-inventing the wheel on an overland vehicle, so the idea of using an electric water heater did not sit well. Since a running engine produces all the heat we need, I selected a Helton HW-1 heat exchanger and mounted it in the engine bay plumbed into the engine water-cooling circuit. Of course it only draws heat from a running engine so once we stop, a shower is first on the list, while the vehicle ticks over. If we need more hot water a running engine can fill a jerry in 20 minutes, depending on the initial engine temperature.
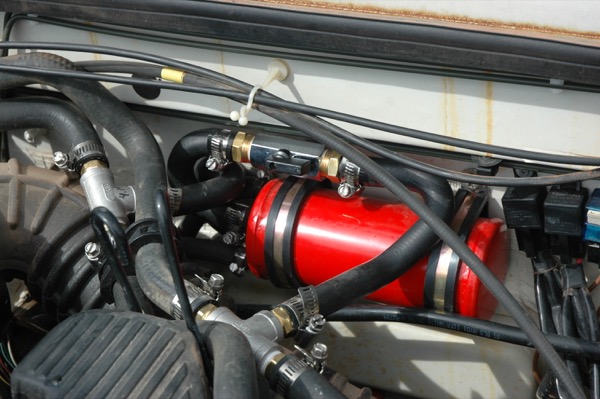
I decided against an insulated holding tank for water at this point, but that would be one addition that may be useful to those who like a morning rather than an evening shower. Since showers take a lot of water we will typically draw shower water from a jerry rather than from the on-board water tanks. This allows us to more accurately gauge water use.
Pump and hose
I chose a SHURflo RV 3390 pump that delivers up to 2.8 US gallons (10.6 litres) per minute at 40psi. The pump has a pressure switch that cuts flow at 45psi and re-starts it at 25psi. In conjunction with a toggle switch mounted by the back door, manual activation is simple. A small, easily cleanable inlet strainer serves to protect the pump from sediment and I adjusted the stop pressure on the pump to deliver 0.5 gallons per minute through the filter circuit to prevent overloading the filter.
To link all the parts together I selected several different runs of hosing. For the link between the two tanks and for the pick-up lines I used clear, braid-reinforced PVC hose with a half-inch inner diameter. This hose also fed into and out of the pump. For the lines running to the heat exchanger I used Buna N PVC hose, much like that used in vehicle cooling systems. I selected black and in future will insulate the return run from the heat-exchanger to improve shower heat. For the runs from the filter I used 3/8” polypropylene hose which is food-grade and very convenient with the press-fittings on the filter housing.
Connecting it all together
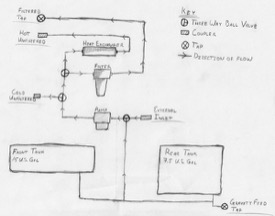
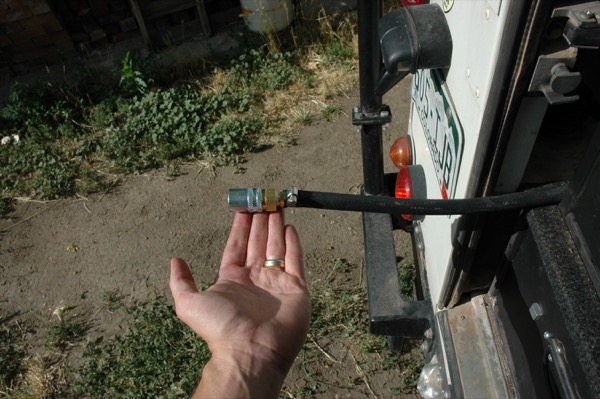
With components chosen, it was just a matter of becoming a plumber for an afternoon and connecting it all together. See the accompanying diagram. To select the source (hot, cold, potable) I used brass three-way ball valves. For changing from shower to tap I used couplers on all the outputs with the exception of the filtered water. I wanted to make sure no tubing that had contacted non-potable water could be connected downstream of the filter.
Using the on-board pump, the system can draw, filter and heat up water from the two onboard tanks, or with a hose reaching out to an external source such as a jerry can, a well or a stream.
We have four types of water on hand
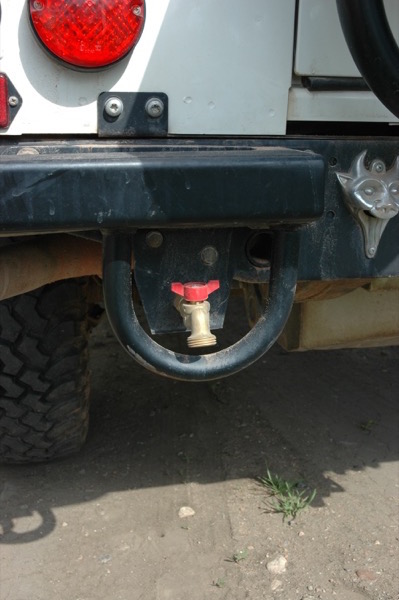
- Gravity feed from a tap mounted low at the rear of the Defender. It’s a handy way to wash your hands after a messy chore and also serves as an emergency backup should the pump fail, as well as a drain valve for the entire system. Water from the tap is cold and un-filtered.
- Cold, un-filtered water pumped to a coupler at the rear door. This is used to fill the tanks as mentioned above and serves as a convenient hose for washing equipment when needed.
- Hot, un-filtered water from the heat exchanger in the engine compartment and also pumped to a coupler at the rear door. We have a regular hose and a shower attachment for this one.
- Finally and most importantly, potable pumped and filtered cold water dispensed from a dedicated tap at the rear door.
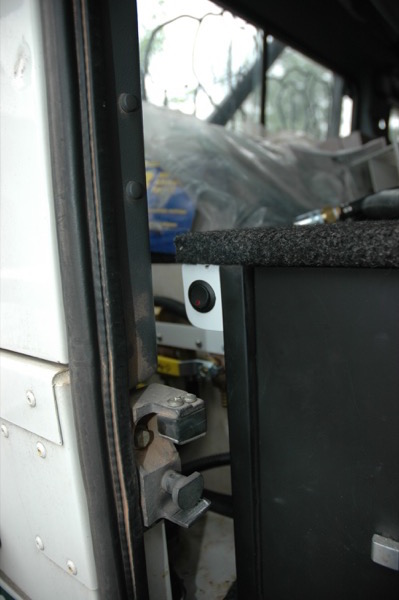
The system as installed is for temperate environments and must be drained to prevent freezing in cold weather. It would not be too hard to add line insulation and tank heaters to allow cold weather operations.
The couplers use o-rings to ensure a good seal but being positioned close to the rear door on a Defender (possibly one of the dustiest places in the universe), when not connected dirt can easily get into the female fitting and damage the o-rings. To avoid this I fit loose male plugs in the female fittings when not in use, and wipe male ends of a hose free of dirt before connecting.
Because filling a fixed tank can be more difficult than with individual water containers, we still carry a water jerry for quickly topping up the system without a pump as well as a source for showers. A leisurely hot shower can use more water than you think but by using an external source, use is easily gauged and the onboard supply is not affected.
Which brings up a current weakness in my system: how much water is on board. The plastic main tank is transparent enough to view the water level, but the quarter panel tank is not. To get a better idea of remaining capacity I set the top of both tanks to within a centimeter of each other. The main rear tank is deeper than the plastic tank, so once the plastic tank is empty we have a reserve of 15 gallons. Next job is to add a level sensor to the system.
|