|
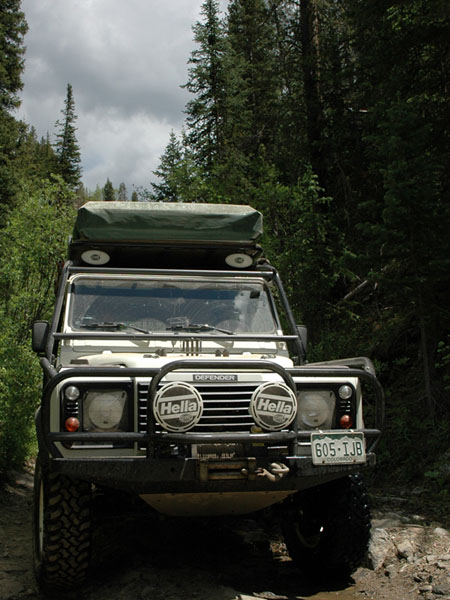
Development continues with the addition of new equipment and further refinement of our previous ideas. Many of these modifications are being made with a future trip to Australia in mind.
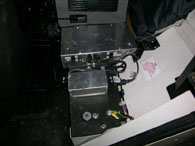
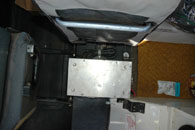
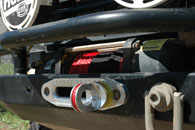
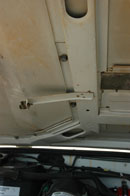
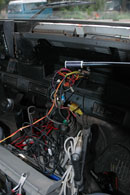
In order to free up some space and to consolidate and simplify some of the wiring, I removed the aluminum chassis box that housed our two 12 volt power points (see first pic below). I relocated the power points into the inverter box. Now the power point for the fridge is facing the fridge and the spare is facing the door. In addition, the extra grounding point was removed, and the switch for the roof rack power point was rewired so that it can handle 20 amps. The fuse holder for the roof rack power point was moved inside the box out of sight and harms way. This has really made a difference in the clutter in this area, and has freed up significant space for future additions!
|
|
|
|
The old and messy.
|
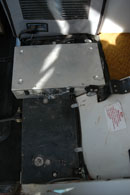
The new and much more tidy!
|
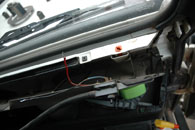
New fridge plug-in.
|
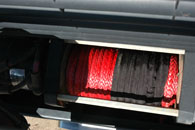
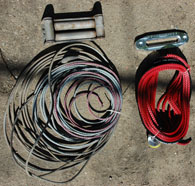
A winch is a heavy piece of equipment, and weight is a constant enemy for an overland vehicle. Because of this I wanted to remove the steel winch line and use synthetic winch cable instead. Scott from Expeditions West was nice enough to get an appropriate line from Viking Off-road. The experts at Viking recommended a 3/8th inch line which has a breaking strength of 19,600 lbs. I installed 80 ft of Viking fire line (critical temp 450°F) complete with Safety Thimble on the business end and an aluminium hawse fairlead kindly supplied for free by Keith at RoverTracks. Overall this change saved 32 pounds! Viking also supplied a 50 foot extension cable which can also be used with our fabric bucket to draw water from deep wells.
|
|
|
|
Fine looking and lighter!
|
Shiney red cable ready for action.
|
Out with the old and heavy.
|
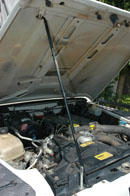
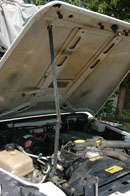
The single post bonnet stay on the truck is actually stock for the TD5 Defender. Unfortunately it was a huge step backwards in design, and was only fitted for the TD5 due to clearence issues. Not only is it hard to use, it can be downright dangerous trying to unclip it while silultaneously supporting the bonnet especially if the spare wheel is present. In Dakhla, a mechanic grabbed the stay and yanked on it, seriously bending the clip. I tried to fix it, but it started to crack the metal around it and the end of the stay began rattling against the air box. To remedy this unfortunate state of afairs, I wanted to source a bonnet stay from a previous model. The earlier bonnet stay on the V8, 200 and 300 tdi Defenders is attached permanently at both ends and unfolds as the bonnet is raised. I sourced the mounting hardware in a scrapyard in Pretoria, but unfortunately they only had severly bent stays. I ordered one from George at Rovers Down South, and for $15 I now have a fantastic non-rattling, folding bonnet stay and the engine compartment is more how it should be.
|
|
|
|
Could be off any car.
|
The clip saw some rough action in Africa.
|
New folding style is really old.
|
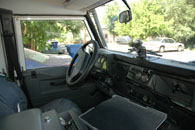
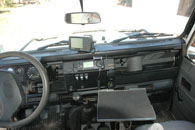
The Defender dash is the worst part of an otherwise exceptional vehicle. It is a huge conglomeration of space wasting plastic with few and hard-to-reach places for accessories. It seems ergonomics were not invented when the Defender was designed. Adding a GPS, light switches, even an additional powerpoint is a chore. Making it look neat and tidy is a mission! One of the easiest ways to add switches is to a custom plate on the stock Defender DIN radio mount. This was my first solution and it worked pretty well. It included 4 switches and 2 guages. Now, with the addition of an Icom 706MkIIG radio, more space was needed. I got a Mud UK center dash console from Expedition Exchange which will serve as a temporary fix until the complete dash re-build. (Watch this space and take a peek at VDE for a hint!)
|
|
|
|
The old set up. Notice the GPS antenna cable on the map light.
|
The rear of the Mud-UK console installed, and the front of the old tray removed.
|
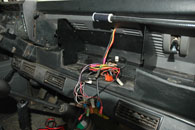
Wiring! Always lots of it in overland vehicles; critical to keep neat and tidy!
|
The Mud-UK dash comes with a front plate in plastic that can be drilled for any manner of toys. It also has a full rear surround of sheet metal is bolted to the standard dash back. Since it was made for pre-2000 Defenders, a little trimming is needed on the sheet metal to get it to fit the post-2000 dash tray. But that's easy. The front of the standard dash tray has to be cut away to allow space.
|
|
|
|
Wiring for the map-light. Notice all the wasted space behind the trim.
|
Almost there. Just needs the additional switches.
|
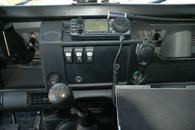
Looks better and a nice place for the Icom radio.
|
The console has two recesses for the standard rover accessories. In this case the rear wiper switch and the power point. The additional switches are for the front and rear lights and were sourced from Off Road Rockers. Final lower switch is for the accessory power for the truck. When I installed the GPS antenna on the truck, I did not route the antenna cable through the top of the dash as I should have. With the dash apart I took the opportunity to correct that.
|
|
|
Close view of the switches.
|
Antenna cable re-routed where it should be.
|
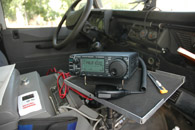
To further communications in the field we needed a ham radio in the truck. After a lot of research I decided on an Icom 706MKIIG. It affords 2m for most travel, but also allows HF for long range coms which will be very useful in the outback.
|
|
|
|
The radio sitting on the desk during power checks.
|
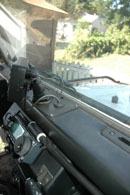
Main body is mounted underneath the new luggage rack.
|
The head is mounted on the new Mud UK dash console.
|
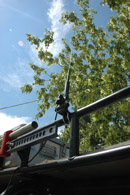
Since Graham only has a technican license at the moment we only got a dual band (70cm/2m) antenna. For HF a new license and another antenna will be required.
|
|
The antenna mounted on the roof rack.
|
|